Last updated on 2025-01-09
Details
Video
FAQ
Download Installer
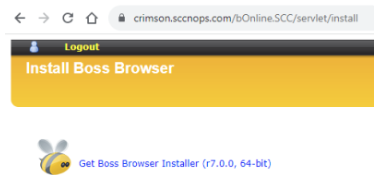
- Go to https://crimson.sccnops.com/bOnline.SCC/servlet/install
- Login with your SCC username and password. (NOTE: the username must be in all lower case when logging into the OSS.)
- You will be prompted for multi-factor authentication. Depending on how your account is set up, it can be:
- EITHER a phone call to your registered mobile, to which you need to respond with a PIN.
- OR a prompt on your Microsoft Authenticator App, which you need to approve.
- Once you have logged in, you can download the installer.
Installation
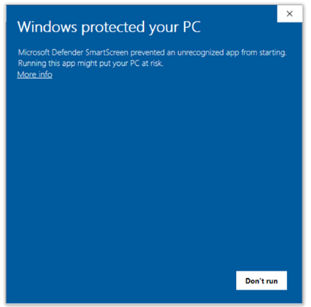
- Double click on the installer to start.
- You may receive a warning like below, if Microsoft Defender SmartScreen is enabled. Click “More info”, and then “Run anyway” to proceed.
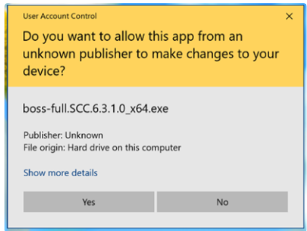
- You may also receive a warning like the following, if Windows User Account Control (UAC) is in use. Click “Yes” to continue.
- The wizard will step you through the installation process. Our recommendation is to accept all defaults suggested by the wizard. They should work for most cases. Change them only if you have specific reasons to do so.
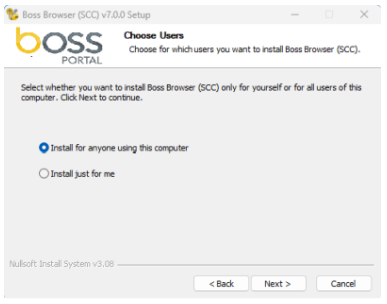
- The “Choose Users” screen is presented only when the installer is run by a user with admin rights. Keep the default selection for “Install for anyone using this computer”. This will make the installation available to anyone who logs onto the computer. This is important if you are a Sys Admin and setting up computers for others.
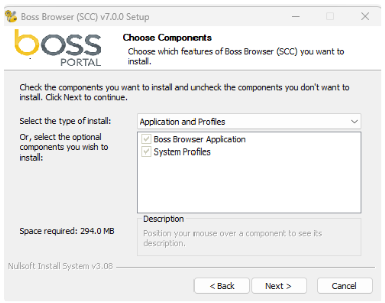
- On the “Choose Components” screen, accept the default selection for “Application and Profile”. It ensures you have both the latest application programs and profile settings.
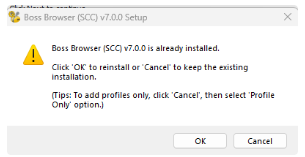
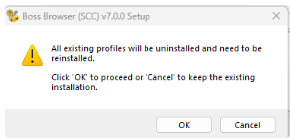
- If there is an existing installation of the client on the PC, you will see a warning like below. Click “OK” to acknowledge it and continue. The existing installation will be automatically uninstalled as part of the new installation.
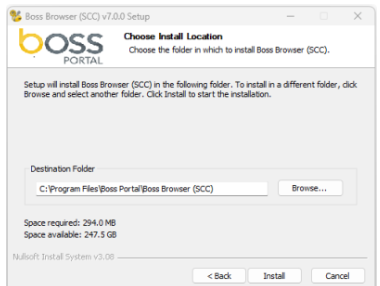
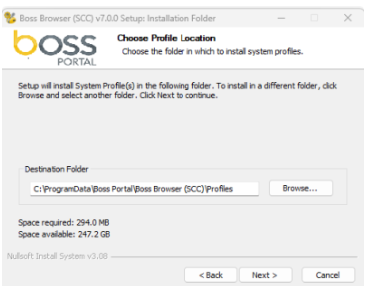
- Accept the default locations for application installation and profile installation.
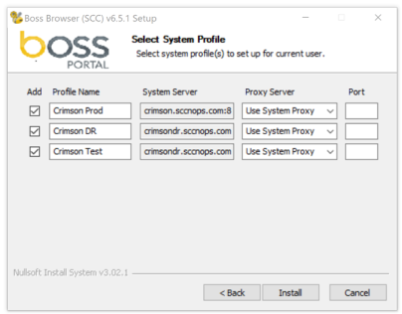
- On the “Select System Profile” screen, accept the default selection. It will put three icons on your desktop for accessing different instances of the OSS: Production, Disaster Recovery (DR), and Test.
- To skip a given profile, untick it under the “Add” column.
- The “Proxy Server” drop down list lets you select between “No Proxy”, “Use System Proxy”, “Auto Detect”, and “Specify” your own. Choose “Specify” if you want to enter your own “Proxy Server” and “Port”.
Upgrade/Downgrade
- For upgrades, the procedures are no different to a fresh install as described above.
- For downgrades, first uninstall the existing installation. Refer to the section below on “Uninstall” if necessary. Once that is done, just install the desired version.
Uninstall
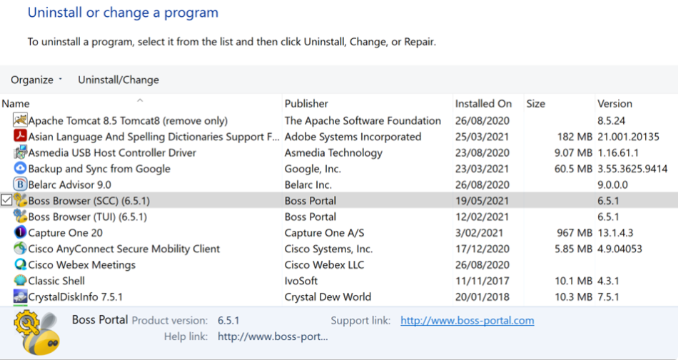
- Open “Control Panel” in Windows. Select “Program and Features”.
- Select “Boss Browser (SCC)”. Then click “Uninstall/Change”.
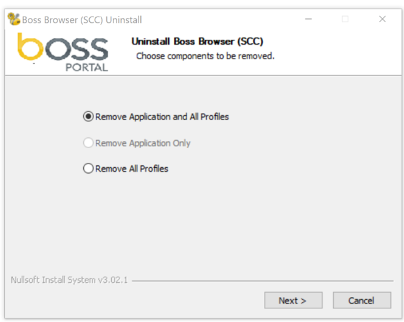
- Choose the “Uninstall” option and follow the wizard.
- Choose “Remove Application and All Profiles”. Click “Next”.
Useful links